
Presentation Mode is a new feature that empowers teachers to deliver instruction and collaborative modeling without altering any existing classroom workflows. The feature allows educators to annotate instructional content with digital sticky notes for student access, submit shared assessments on behalf of the whole class or targeted groups, and pre-populate partial responses to provide structured scaffolding when needed. Because it functions as an opt-in layer, this feature is a flexible & high-impact instructional tool that drives student engagement and differentiation with zero disruption to current lesson setups.
Some examples of how to use Presentation Mode:
- Teacher annotates a lesson (such as a reading) with sticky notes & highlights that students can access.
- Teacher completes an assessment with students (“group work”) where responses are submitted on behalf of students.
- Teacher partially completes an assessment with students to scaffold an assignment. Students then build upon those partial answers when completing the work independently.
How to use Presentation Mode:
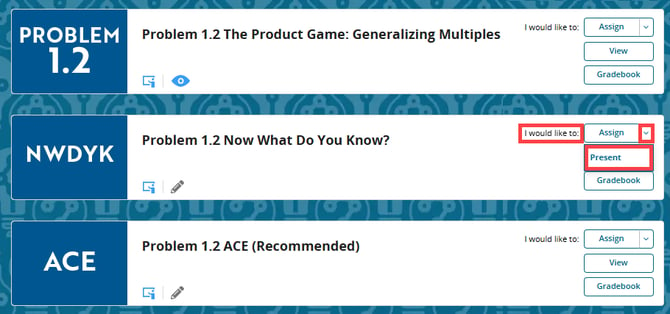
- Click the dropdown next to "I would like to" and choose "Present":
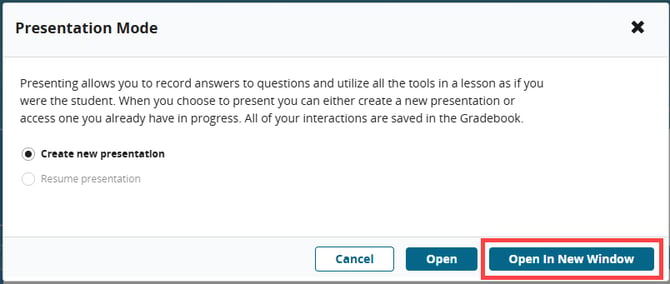
- As a teacher, you have the option to open the lesson in the current tab or in a new tab. Opening in a new tab allows teachers to present the lesson to the students from the new tab while previewing the lesson as a teacher from a different tab. Click "Open In New Window".
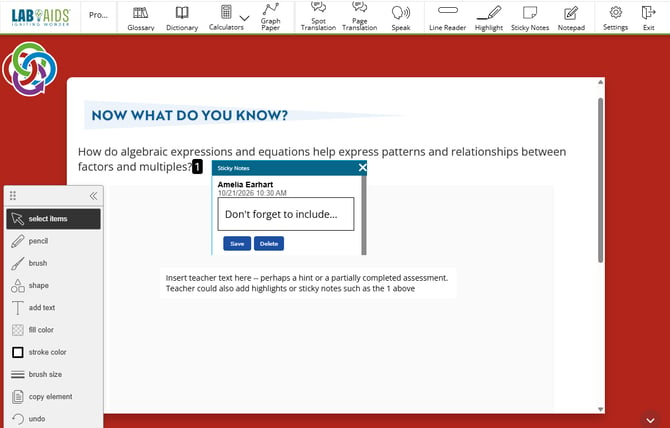
- The presentation is then assigned to the teacher. The teacher can go through the lesson as the students, poll the class for answers, or have the students work through the lesson on a SmartBoard. Teachers can add sticky notes, highlights, or complete the assignment as students would.
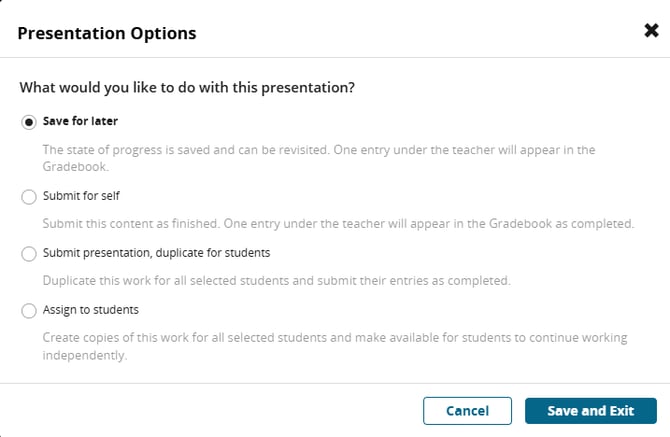
- When the lesson is finished, click "Save for Later" or "Exit." If the latter, you are given an option of what you would like to do with the presentation:
-
- Save for later: Presentation can be opened again and continued during the next session. It will pick up where it left off.
-
- Submit for self: This will send the lesson to the gradebook and not distribute to students. Lesson appears under "Needs Manual Grading" and cannot be continued.
- Submit presentation, duplicate for students: This will give a copy of the completed lesson to the students chosen and apply the grade to their gradebook. This will submit their entries as completed.
- Assign to students: This will assign the lesson to the students and they can pick up where the class left off to finish the lesson for themselves. Anything that had been completed during the presentation will be viewable to students.
- Click "Save and Exit".
How to view/continue a previous presentation:
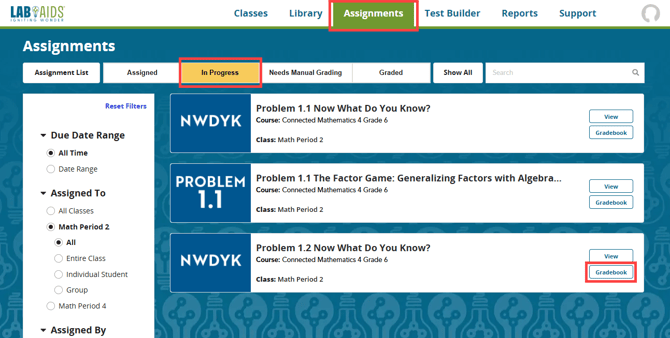
The lesson that was presented by the teacher is marked with a "P" for "Type", and the teacher's name appears as the student name. Click the three dots and "Continue Presentation" to continue.
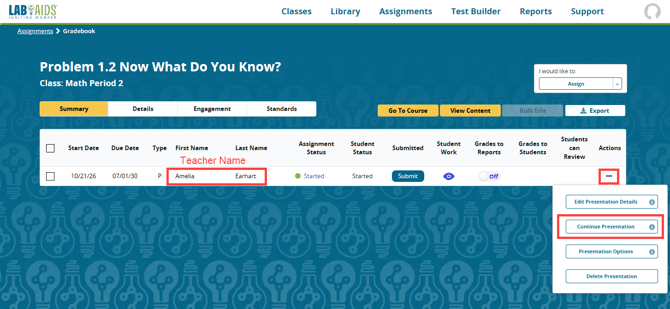
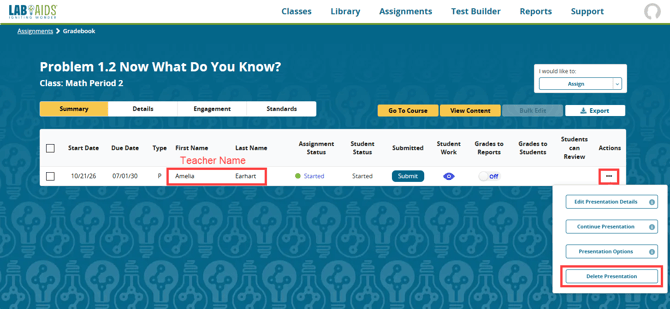
If necessary, you can delete the presentation by clicking "Delete Presentation" at the bottom of the same popup:
Questions? portals@lab-aids.com